Friday, April 15, 2022

Rosie Makes Oyster Stew.


_


It’s springtime on the Outer Banks.  That means the weather could be sunny with temps in the high 70s or 80s  OR it can be windy and rainy with temps hovering in the 40s.  You just never know down here.  As it turned out, Plan B - the cold scenario - was in effect last week.  And I had a hankering for soup.


  We’re working on our last bushel of oysters for this season, so I started out with oyster stew.  But you know how Rosie rolls.  Oyster stew can easily turn into a seafood mélange.  Which it did.


First, I needed a base for the stew so I’m making shrimp stock.
Here’s how:

I always have bags of shrimp in the freezer, so I pulled one out, thawed out the shrimp, and saved the shells.  Coarsely chop up an onion (Don’t bother to peel; skin goes into the pot too.).  And chop some celery stalks and a couple carrots.
Now you’ve got the makings for your stock.

Heat a little oil in your pot over medium heat and add in the shells, stirring and cooking for a few minutes, until the shells turn pink and you’ve got that lovely, shrimpy fragrance wafting about.


Add in a handful of peppercorns.
 
Add in the onion, carrots, celery.

Stir it around and cook a few minutes.

And pour in about 5 cups water to cover.

Add a little salt.


Bare simmer for about 45 minutes.


Discard the shells and the vegetables and you have a lovely, aromatic, flavorful shrimp stock.


Now let’s get the fixin’s for the oyster stew.

Gather ye ingredients:
1 pint oysters and their liquor
2 TB butter
1 small onion, chopped
1 celery stalk, chopped
2 large mushrooms, sliced
juice 1 lemon
2 TB flour
1 1/2 cups shrimp stock
1/3 - 1/2 cup cream sherry  (to taste)
3 oz. Brie cheese, cubed (rind removed)
1/4 cup skim milk
3/4 cup cream
kosher salt and freshly ground pepper, to taste
parsley and celery leaves and/or chives or scallions for garnish

Melt butter over medium heat in medium-sized soup pot.
Stir in onion, celery, and mushrooms and cook about 2 minutes, stirring.
Sprinkle in flour and cook and stir another minute.
Slowly pour in lemon juice, shrimp stock, and sherry.  Stir and let thicken. Bring to boil, then reduce heat to low and bare-simmer about 15 minutes.
Add in diced Brie; stir to melt.
Stir in oyster liquor, milk, and cream.
Season to taste with salt and pepper.
Heat to hot but not boiling. 
Remove from heat.
Drop in oysters.  Give it a stir and let oysters sit for about 1 minute, then serve.
Garnish with chopped parsley, celery leaves, chives, and/or scallions.

Now, for the step-by-steps:


Have your vegetables sliced and chopped, ready to go.


Diced Brie.


Melt butter over medium heat in soup pot.
Add in onions.

Celery.
Mushrooms.


Stir around.
Add flour
and cook a minute,
stirring.


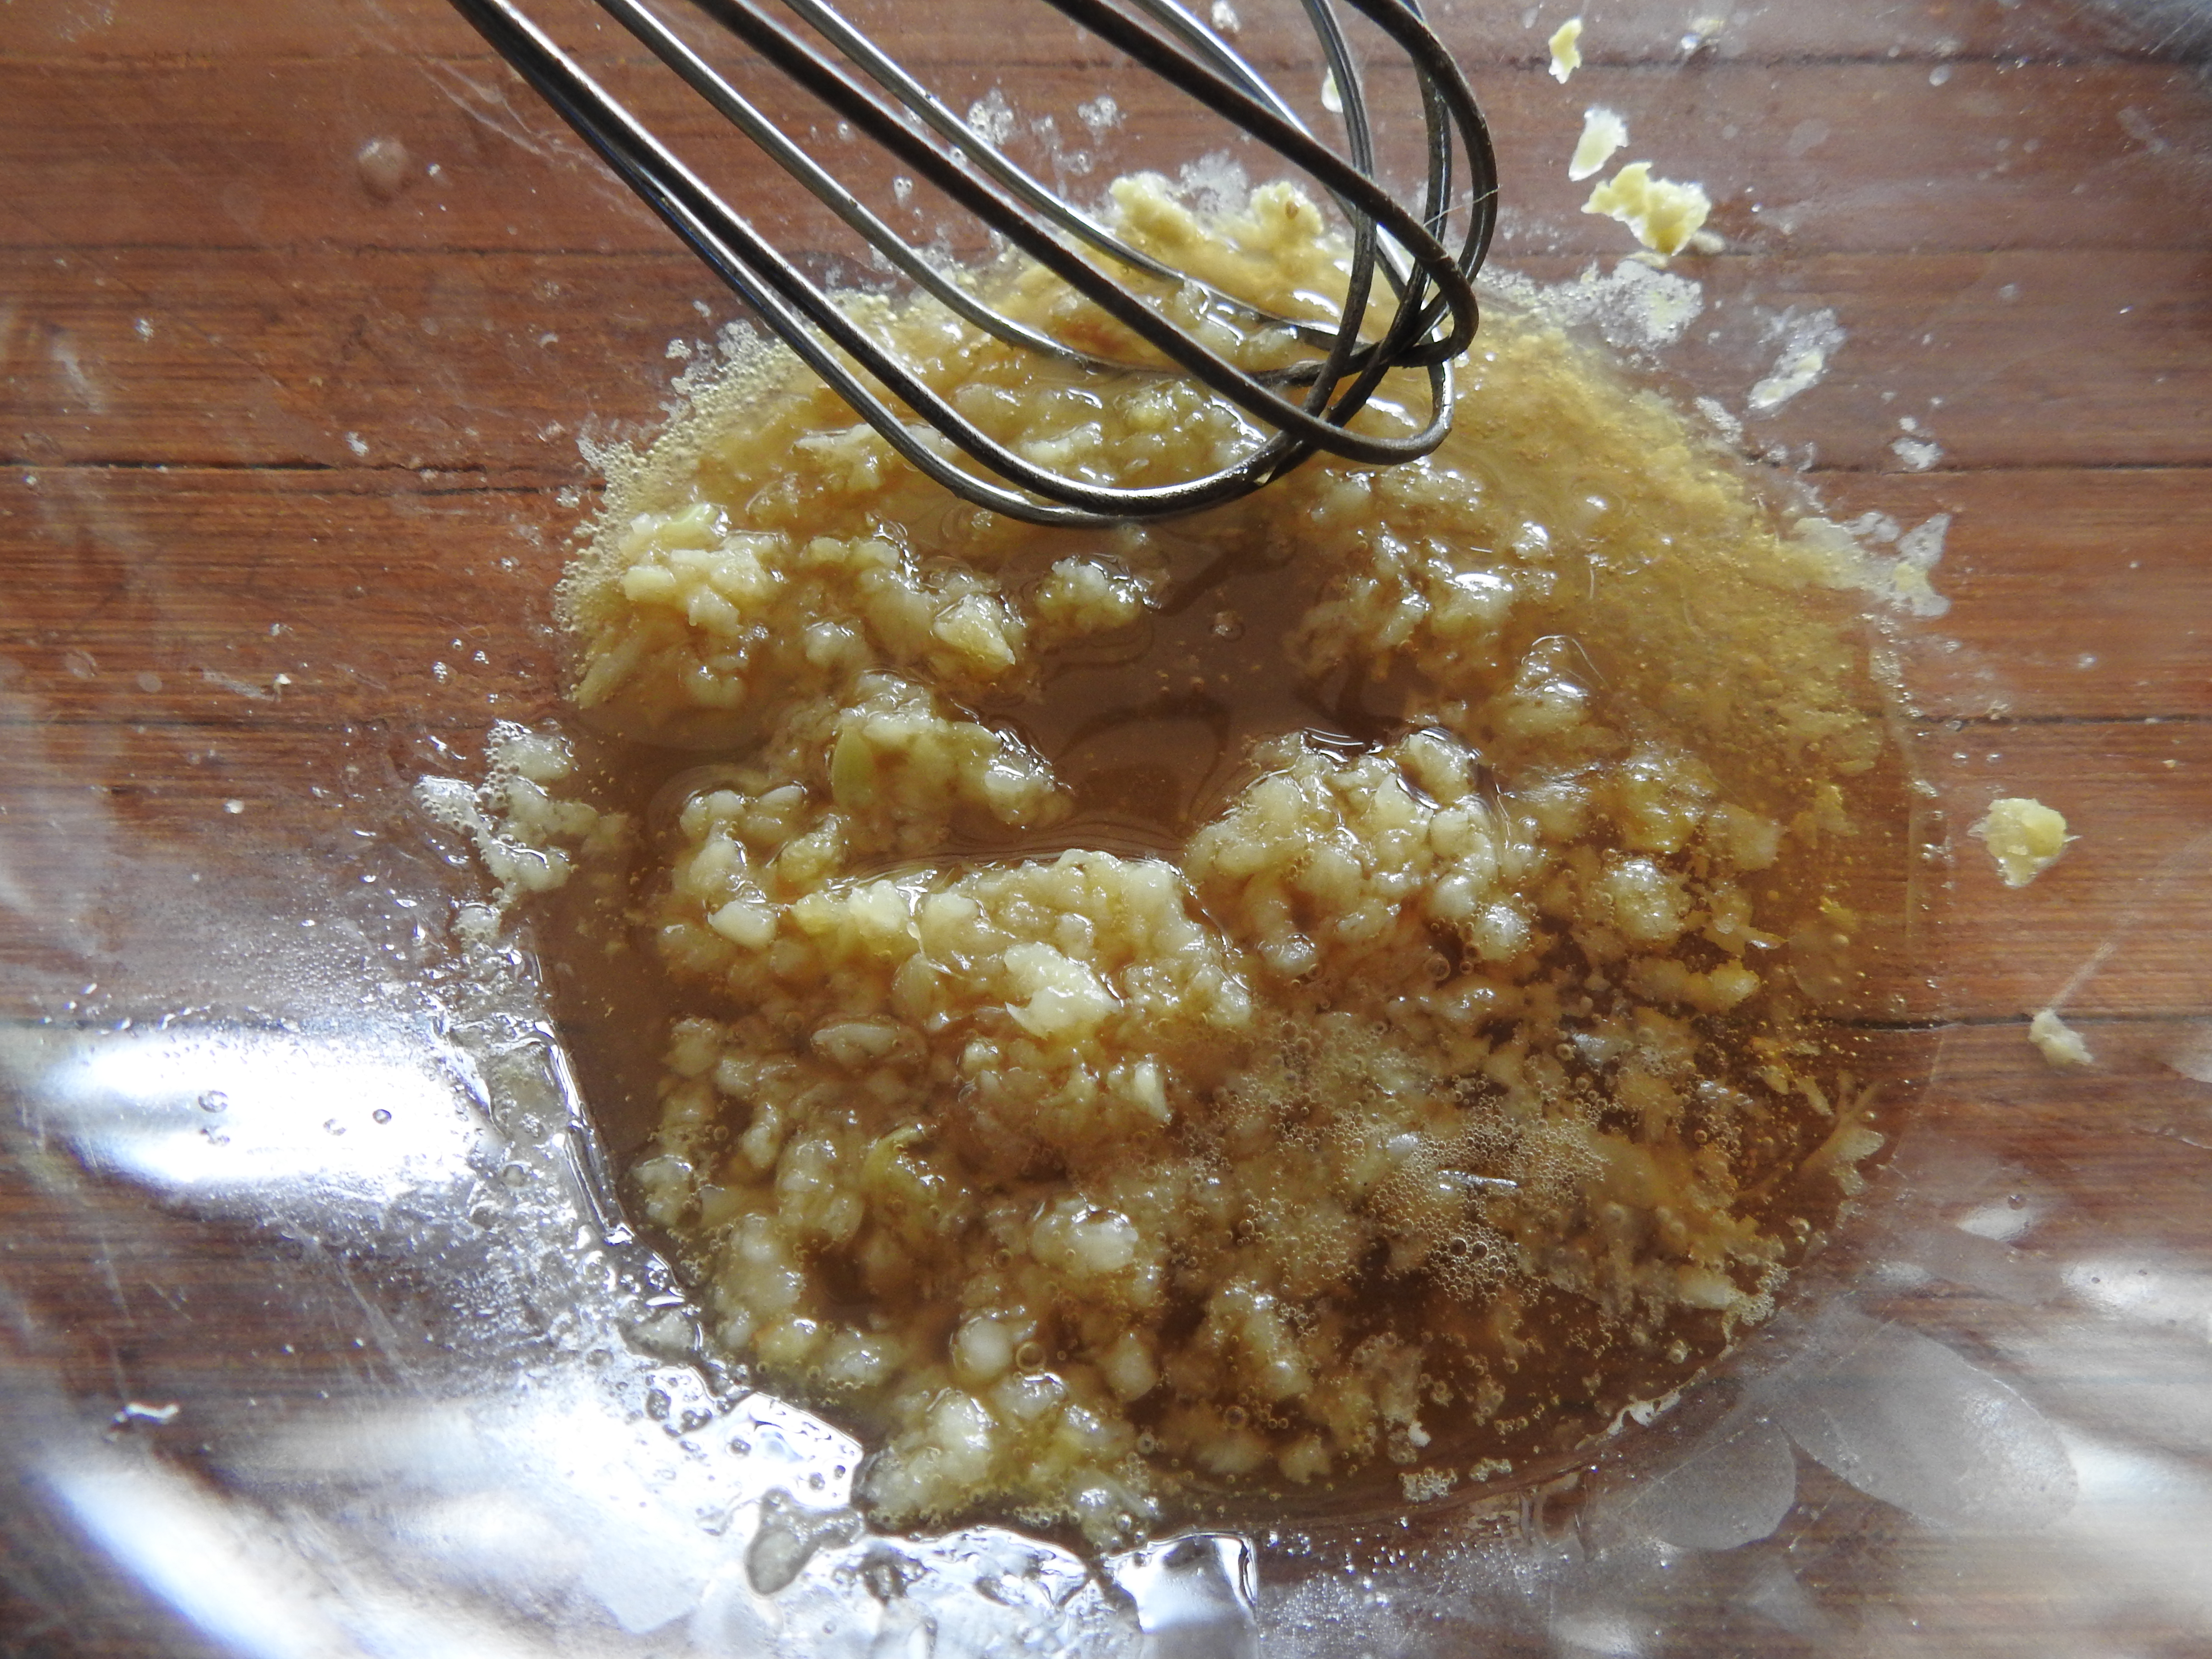
Stir in lemon juice.


Slowly,
stir in shrimp stock.
 
.

Add sherry.
Let thicken.
Cook over low
for about 15 minutes.
Add Brie.


Stir until melted.

Pour in oyster liquor.
Milk and cream in.
Let it get hot.
Add in oysters.


Ready to serve.

Alternative serving suggestions:
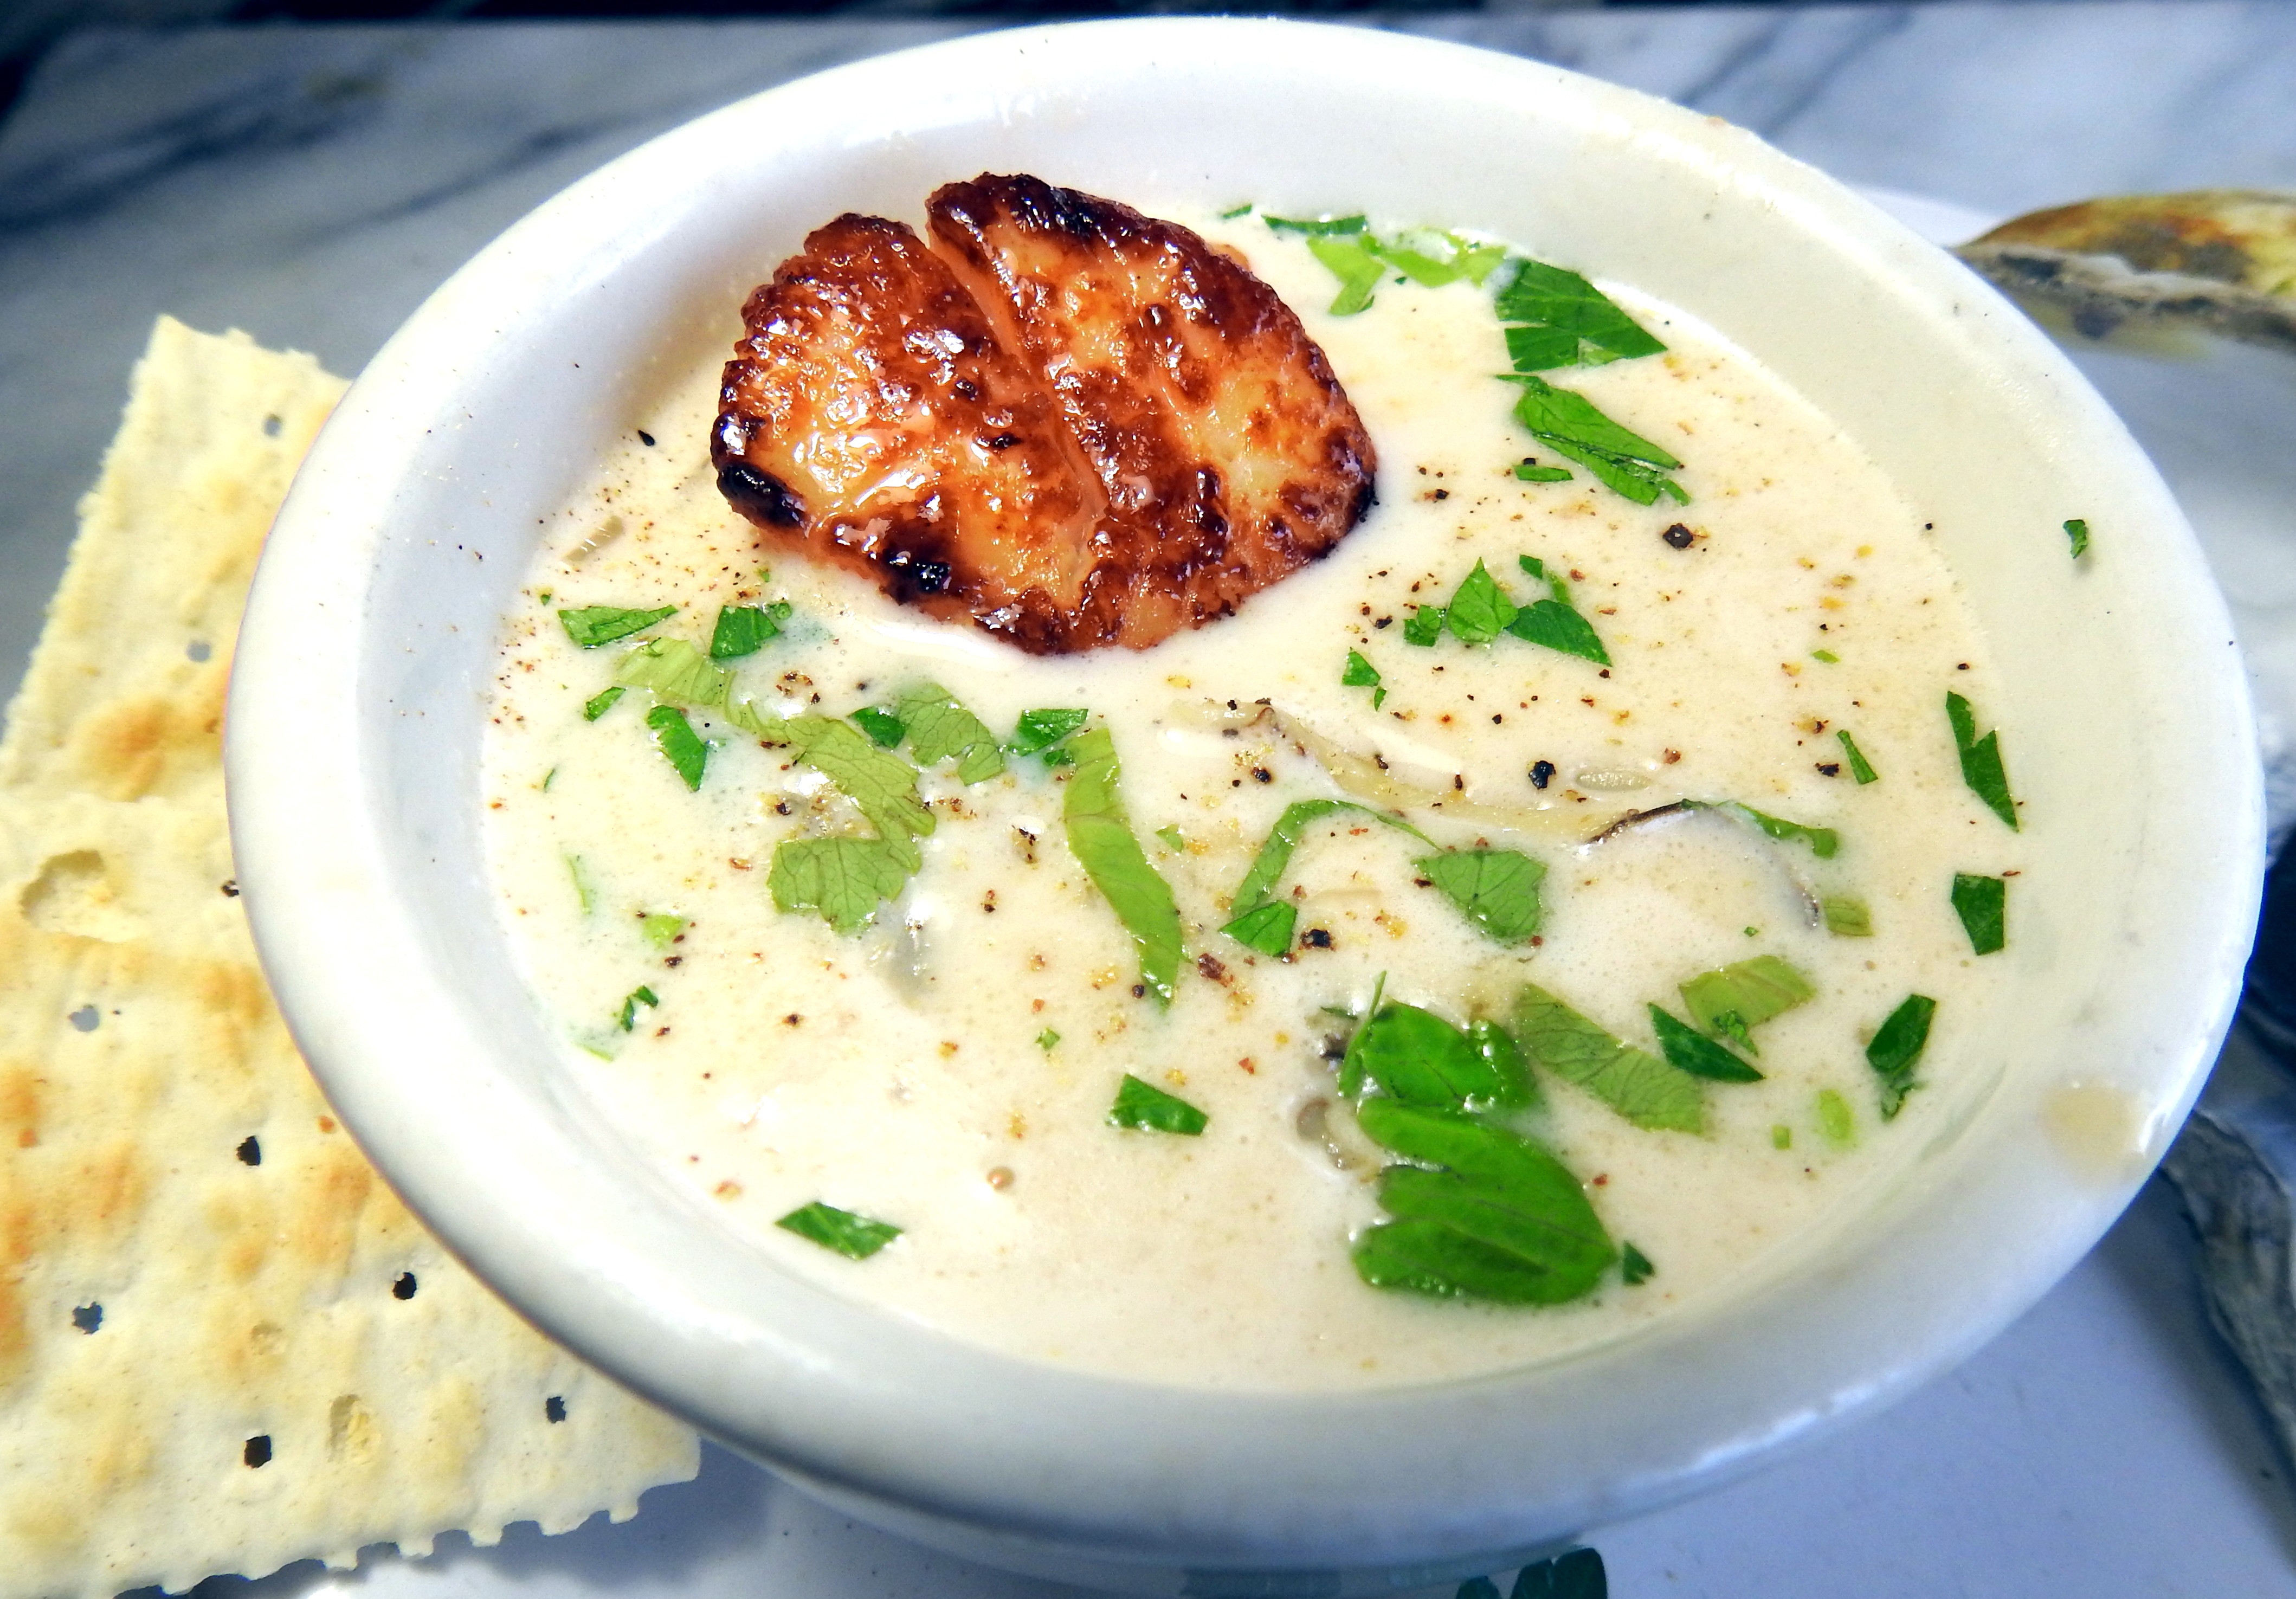
I like a little greenery to go with my stew, so I chopped up some parsley from the garden along with some celery leaves.  Chopped chives and/or scallions would work here too.
If you like, take the shrimp you peeled and used the shells for in the stock, either sear them or boil them, and use them for another surprise seafood in the stew.


Serve with Saltines, oyster crackers, or croutons for a nice crunch.
 
 
Now, I also had some scallops, so I decided to add a few of them into the my cup o' soup.
To prepare the scallops, pull off that little tough side muscle and pat them dry.  Heat your skillet over medium-high and add butter.  When the butter gets hot and foamy, place the scallops in.  These were large scallops, so maybe 1 1/2 - 2 minutes on the first side and  30-60 seconds on the second side.  Depends on how hot your pan is and how many scallops you have in the pan.
You want the pan plenty hot, so you can sear your scallops, but not so hot that the butter burns.  And whenever you're searing or frying anything, don't crowd the pan.  Crowding drops the temperature and you won't get that nice brown sear you're looking for.  After the scallops are seared, simply drop them into your soup bowls.


Enjoy!


Wednesday, April 6, 2022

Rosie Wings It.


I’m going with an American favorite this month – fried chicken.  But not fried breasts or thighs, since because of their size, they can be difficult to cook evenly.  I’m using the wings.   And I have a double-fry technique that will produce a crisp, crackly exterior and a juicy interior.  Add to this a complex sweet, savory, and spicy sauce that just coats the wings, and you’ve got a perfectly balanced, winning combination.  In addition, I’m offering a tangy slaw that’s a bit off the beaten path from your run-of-the-mill coleslaw.  I think you’ll like this medley of flavors and textures.


Before I get into the recipe, let’s talk a bit about frying.  The secret to achieving crisp and non-greasy fried food is found in maintaining the proper temperature of the frying oil.  That said, I have come across one of those spiral bound and heavily stained hometown recipe books usually put out by the blue-haired ladies-of-the-church (and always a veritable treasure trove of Americana) which professes the secret to perfect fried chicken to be “peanut oil and Jesus.”  And I really can’t argue with that.  So, here’s the bottom line:  If your temperature is too high, the surface burns before the food is cooked through.  If the temperature is too low, the crust forms slowly and allows the food to absorb more fat and become oily.  We need a happy medium, which is generally between 350° and 375°.  At this temperature, when the meat makes contact with the hot oil, its surface dehydrates and forms a crust that prevents further oil absorption while still continuing to conduct heat to the interior of the food.  This all leads me to recommend one buy an instant-read laser thermometer– a fairly inexpensive device worth every penny.   It takes the guess work out of frying.


Double Fried Chicken Wings

3-4 pounds chicken wings, cut in two at the joints, tips discarded

 Spicy/Sweet Wing Sauce 

1 TB sesame oil

1 garlic clove, minced to paste

1 tsp grated fresh ginger

¼ cup water

3 TB sugar

3 TB gochujang (Korean chile sauce)

1 TB soy sauce

In large bowl (because you’re going to add fried wings to this later), mix sesame oil, garlic, and ginger.  Microwave for about 40 seconds, until ginger and garlic are fragrant but not browned.  Whisk in remaining ingredients until sauce is smooth.

 Heat peanut oil over medium-high heat to 350° in large, heavy pan.  Mine has a 9-inch diameter and is 5 inches deep.  I pour in about 2 ½ - 3 inches of oil. 

 Batter

In a large bowl, whisk until smooth:

1 cup flour

3 TB cornstarch

1 ½ cups water

Place half wings in batter and stir to coat.  Using tongs, pick out wings, one at a time, letting excess batter drip back into bowl, and add to hot oil, turning heat up to maintain temperature.   I fry 6 at a time, so the temperature doesn’t drop drastically.  Fry about 7 minutes, until coating is light golden and beginning to crisp.  Transfer wings to rack.  Return oil to 350° and continue frying remaining wings in batches, removing to rack.

Increase heat to 375°.  Add fried wings in batches of 6-8 and fry until deep golden brown and very crispy – about 5-6 minutes.  Transfer to rack and let sit 2-3 minutes.  Transfer wings to sauce and toss until coated.

 Now, about that double-frying:  Double-fried wings are crisper and crunchier, even with the sauce, than single-fried wings.  The meat is also juicier.  Chicken skin contains a lot of moisture, so to produce a crisp crust, you need to remove as much moisture from the skin as possible before the meat overcooks.  By single-frying, the meat would be over-cooked before the moisture is driven out of the skin and the remaining moisture makes its way to the crust and turns it soggy.  Double-frying avoids this.  Interrupting the cooking and having a brief cool-down period slows the cooking of the meat itself so you can increase the overall cooking time and expel excess moisture from the skin, resulting in juicy meat and crisp skin.

  Now, for the step-by-steps.

First the sauce:


soy sauce
gochujang
sesame oil
water
sugar
ginger
garlic
 

I ran the garlic and ginger through a press and scraped it into a bowl.
Add in the sesame oil and stir.


Nuke until fragrant.


Add in water.


Stir in sugar.


Whisk in gochujang.

And the soy.

Whisky!  Whisky!
And sauce is ready.
 
 
 Now a simple batter:


Flour
Cornstarch
Water 

Whisk until smooth. 


Get you one of those
big packs of chicken wings.
3-4 pounds


Cut off the tips and discard.


Cut at the joint.


Wings go into batter.
Shake off excess batter.
Place wings in hot oil,
one at a time.
Don't overcrowd the pan.
Maybe 6-8 at a time.


After about 7 minutes, remove from oil and place on rack.
Let oil come back up to temperature and continue frying the wings.


Here's my frying station.

Wings
Batter
Hot oil


This is the first frying.

350°  6-7 minutes

Now, the second fry,

375° for about 5-6 minutes.


Single fried on the left.

Double fried on the right.


Continue frying
and let wings rest on rack.


Then add wings to bowl of sauce and toss to coat.

Perfectly fried wings.

Crisp and crackling on the outside.

Moist, juicy, and tender on the inside.

And, oh!
That sauce.


As for a side dish to fried chicken, you can’t go wrong with slaw.  I know everybody’s got a recipe for coleslaw, however, this cabbage salad is just a tad different.  It’s bright, tangy, nutty, appley, and cheesy.  And it will complement those wings perfectly.


Red Cabbage Salad

1 small red cabbage, sliced

First, marinate the cabbage.  
In a small saucepan, combine: 
½ cup apple cider vinegar 
1 minced garlic clove 
4-5 sprigs fresh thyme leaves 
Pinch Kosher salt

Bring to a simmer, then pour over the sliced cabbage. Toss to combine. Let sit at least an hour. I let mine sit for several hours and it gets to a lovely and wonderful color.
 
Simmer the 
marinade.


 Pour marinade over sliced cabbage.


 Let the cabbage marinate for a few hours. Come in every now and then and toss.

Then drain. 
 
 
 Prepare dressing:
¼ cup cider vinegar
¼ cup Dijon mustard 
⅔ cup neutral-flavored oil  (I used grapeseed oil because I had it.  Otherwise, my go-to oil is Bertolli extra light olive oil.)
Pinch kosher salt
Few grinds of pepper 

Whisk vinegar and mustard until well-combined,  Very slowly, drizzle in the oil, whisking constantly to incorporate and make a perfectly smooth emulsion.  Add salt and pepper to taste.

Whisk vinegar
 and mustard.

Slowly whisk in oil.

Season to taste.


 Drain marinade from cabbage and add additional ingredients:
1 cup chopped walnuts, toasted (to intensify the flavor)
1 or 2 Granny Smith apples, cored, peeled, and cut into matchsticks
Gruyère cheese, cut into matchsticks (about ½ - 1 cup)
Endive leaves, sliced into strips (about 1 cup)
Combine all ingredients, then pour dressing over top and toss.


 Enjoy!